Full-Stack Web Development
A Web Application for Mitigating the Impact of Fake News
The Application
Welcome to the 'Mitigating the Impact of Fake News MQP' Web Application! This project is the interactive portion of the Major Qualifying Project completed by WPI students Alexander Rus and Alex Tian and advised by Dr. Kyumin Lee and Ben Vo PhD. Using this application, you can get the recommended URLs for a particular Twitter user based on their previously visited URLs. The application is built using the M.E.R.N stack among a number of other technologies listed below.
Node Modules:
WPI and the MQP
The Major Qualifying Project is a large scale project that assess students’ knowledge in their specific field of study. Completed in the senior year of undergraduate study, the MQP often involves a combination of research and design. Students, either independently or in teams, work under a professor who advises them in the project process. This very web application is a part of the MQP that has been completed by Alexander Rus and Alex Tian working under Dr. Kyumin Lee and PhD student Nguyen (Ben) Vo.

The Application
The application is built using the MERN development stack, which stands for MongoDB, Express, React, and Node.js. Using Node.js, I built a back-end server using Express. This server would handle data collection and API interaction. MongoDB is a great NoSQL distributed database system that works great for storing our user information. React is a great JavaScript library that allows the creation of UI views using multiple different components. Using the Node package “Concurrently”, the back-end Express server runs simultaneously with the front-end React Application. The Express server calls on multiple different routes when we need to fetch data. For the user data, we call on routes that access MongoDB. These routes accept a particular username, and then send the proper JSON response to the front-end. The URL recommendation models require a lot of computational power, especially when there are over 12,000 URLs and almost 5,000 users in the dataset. Thus, I used AWS (Amazon Web Services) as our cloud computing solution, employing multiple EC2 virtual Linux machines to run scripts that insert the data into the database. Putty provides a good system to allow terminal acess to the serves and Filezilla was used as our means of file transfer to the servers. In addition to the MongoDB serving data to the application, we also employed the Twitter API to fetch real-time twitter information about a given user. To use the Twitter API, we had to register with Twitter to get the appropriate Auth Keys. Once we acquired those, we pass the desired route a Twitter username, and the API returns the data that we desire.
Front-End Development
The front-end of the application is built using React, and to add extra appeal and ease of use, I used the React UI Framework Material-UI. Material-UI is a great framework developed by Google that allows easy integration of components. Within the React front end, I employed multiple react libraries to help present our data.
Upon visiting the web address, you will be greeted by the home search screen.
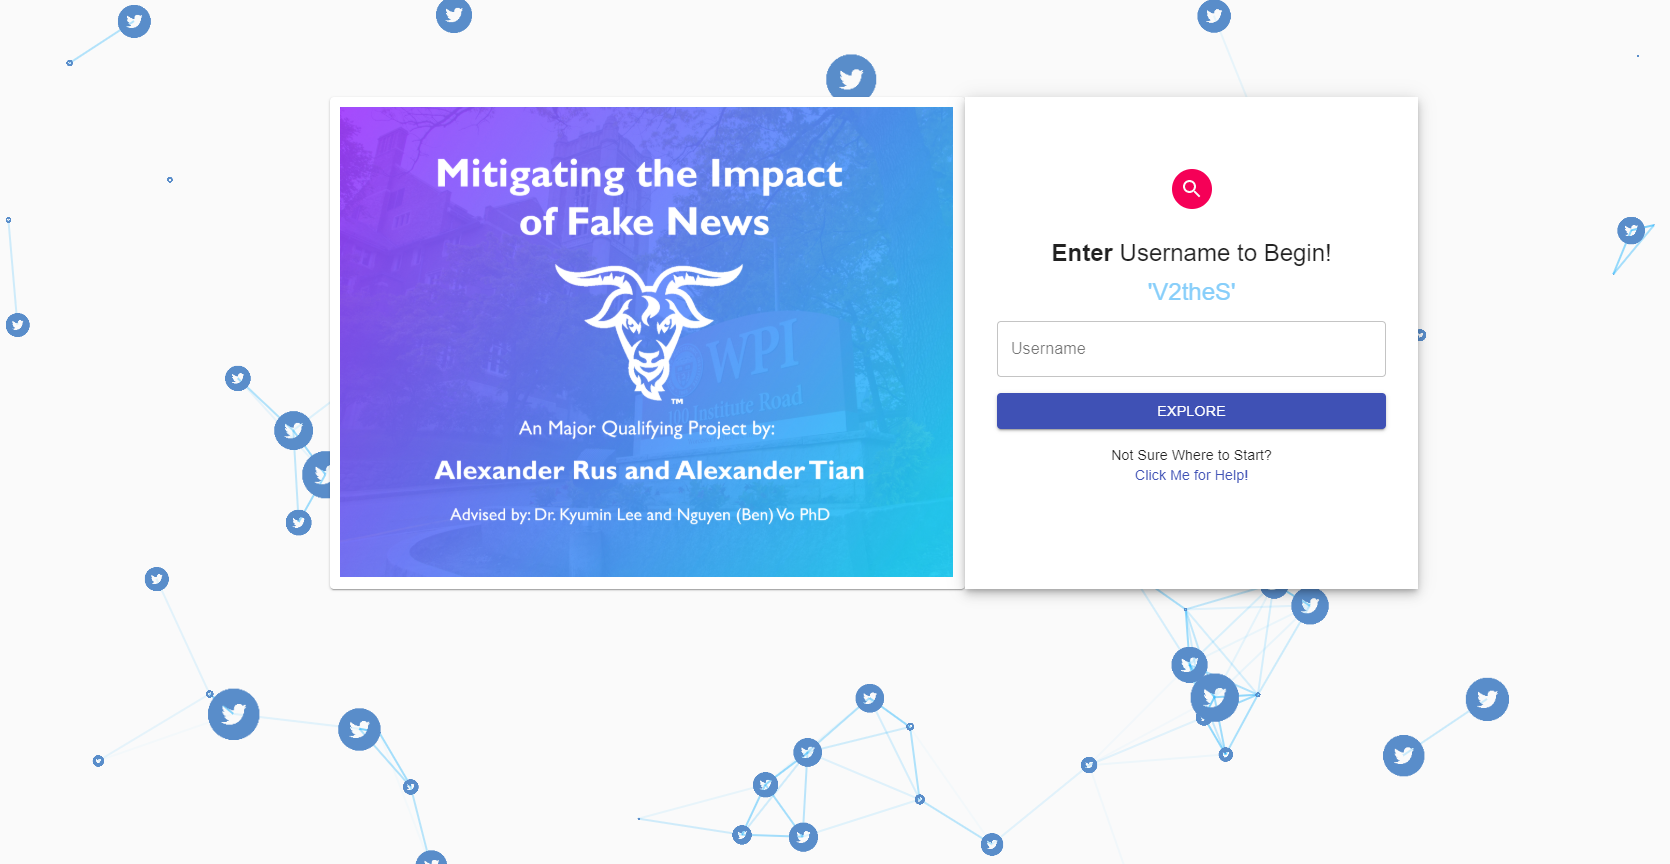
On one side you have the clickable title card display, and on the other side you have the search bar. In the search bar you can enter a Twitter user-name either as a screen name(i.e 'Bob1234') or as a Twitter handle(i.e '@Bob1234'). Because we can only get the recommended URLS for users in our data set, we are ideally going to want to try and enter one of them. We can try entering a random Twitter user and hope for the best, or we can look at the scrolling text for some examples of users we have in the database.
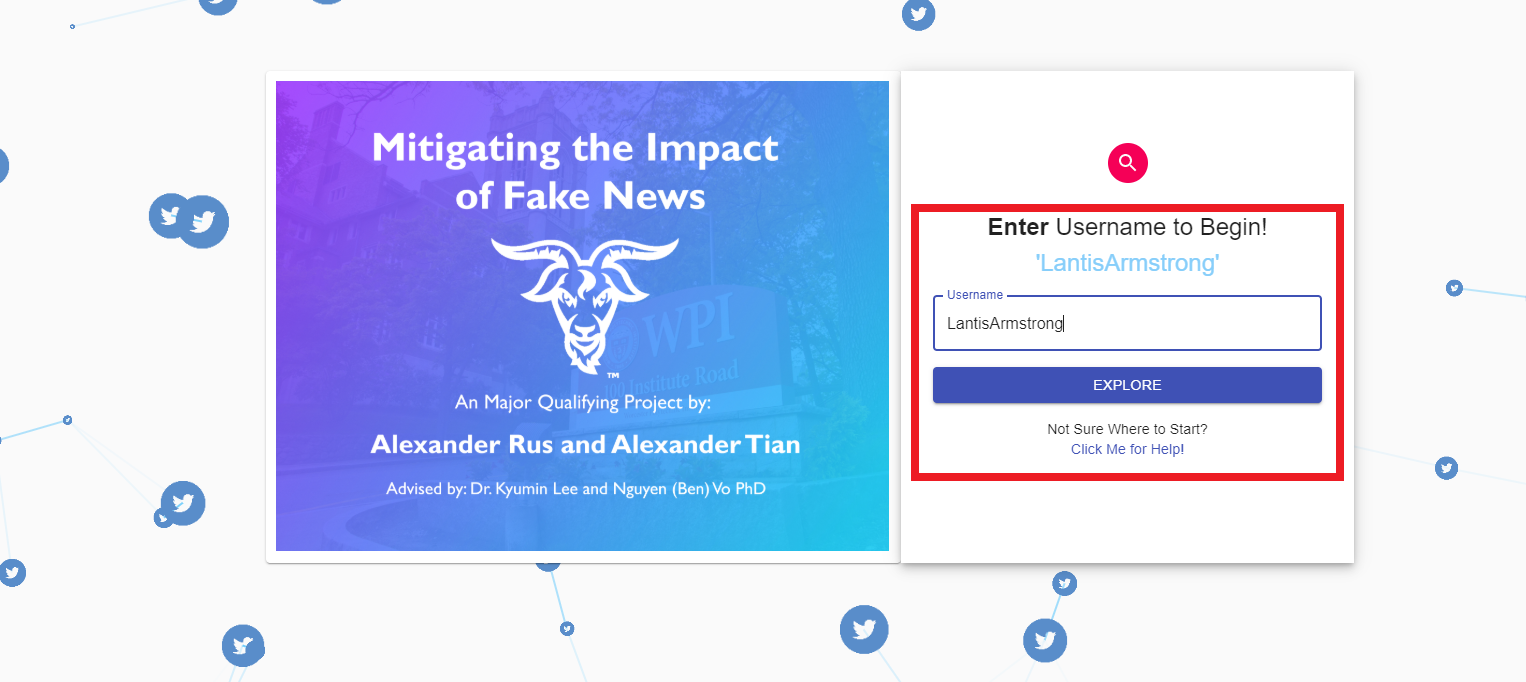
With the user-name in the search bar, hit the 'EXPLORE' button, to be brought to the results page. The results page has a lot of different views, but it will always open with the 'Twitter Information' view first. At the top if we see the two green messages "Located User in Twitter" and "User Found in Dataset", that means we were able to find the Twitter user's information and get their recommended URLs. If one of those messages is red, then we cannot get the recommended URLs for that user.
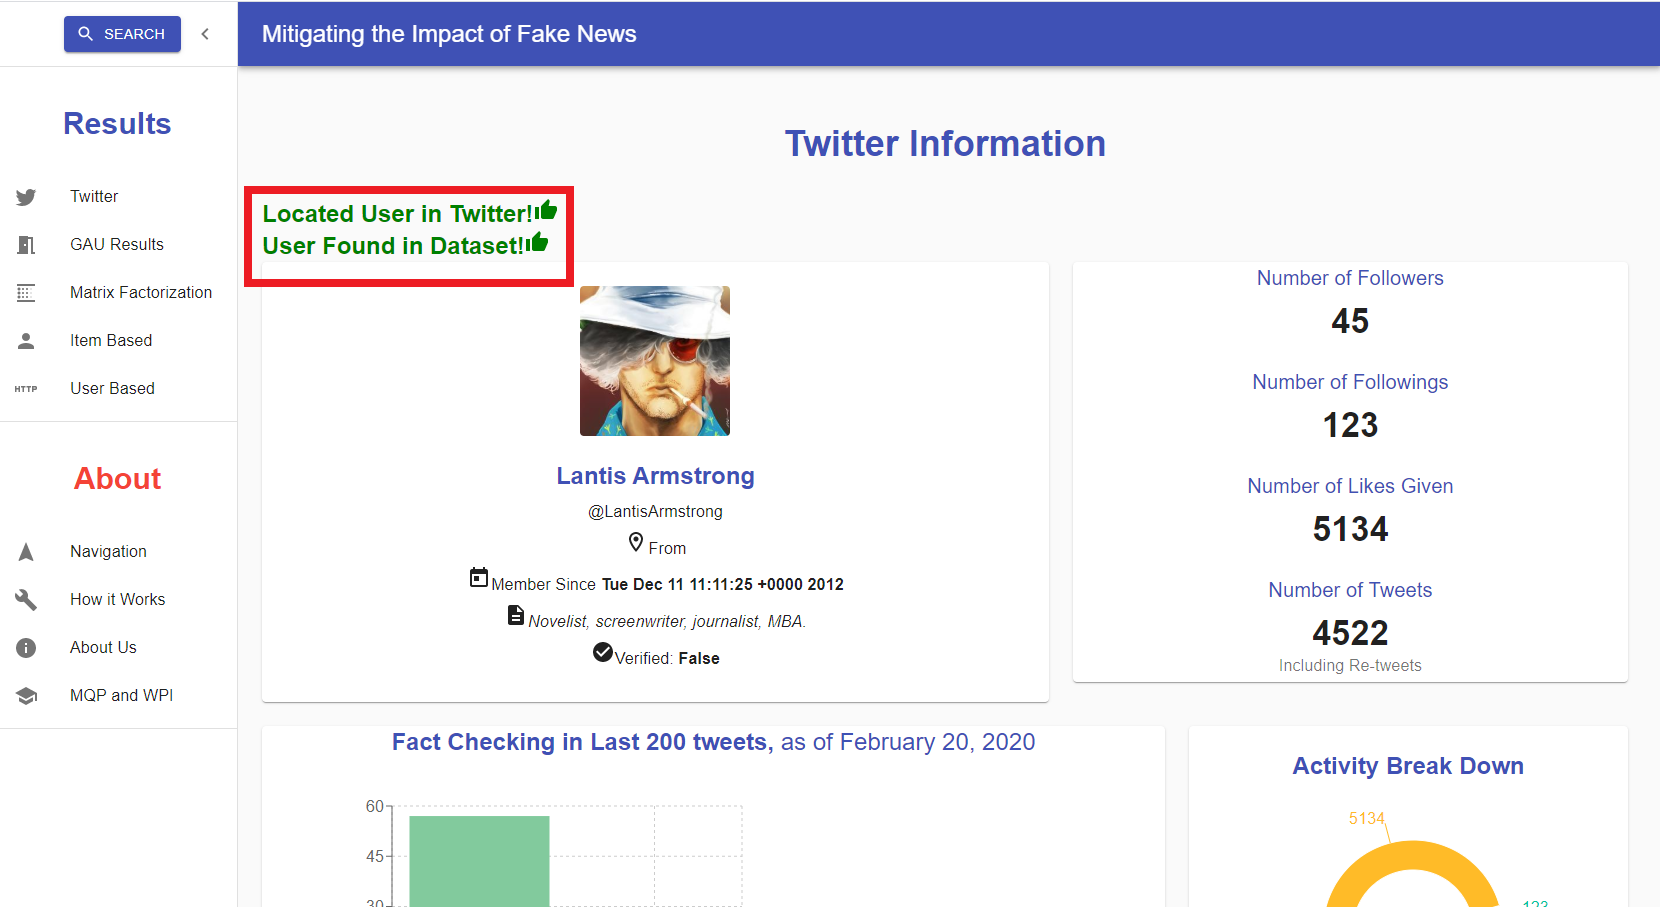
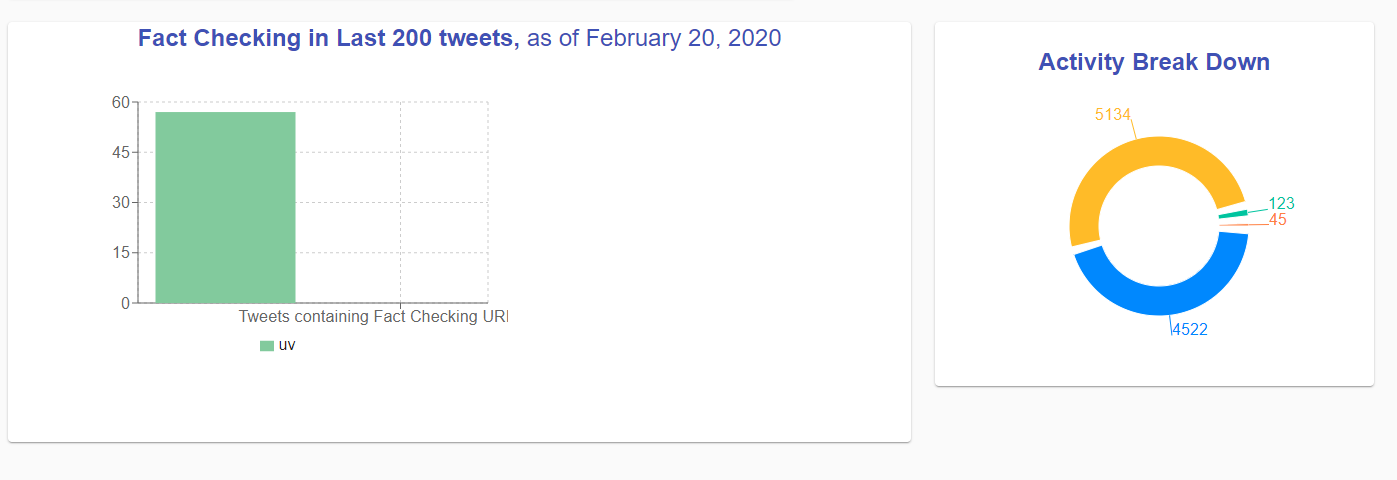
Now we can view various different characteristics about our Twitter user, granted they provided the information in their Twitter profile. We can see some of their profile information in the left side panel and some of their activity stats in the right side. If we scroll down, we can see a graphical representation of their activity on the right. Additionally, we can see their URL recommendation activity at February 20, 2020. We can see that in the last 200 tweets this user sent, 57 of them contained URLs, however none of them were fact checking URLs.
If we examine the panel on the left-hand side of the application, at the top we have a button labeled "SEARCH" which you can click if you would like to enter a different Twitter user into the search bar. Beneath that, we have the "Results" section. In this section we actually see what the recommended URLs for this user are based on our different metrics. Right now, we are in the "Twitter" view, but if we click on the second option, labeled "GAU Results", we are brought to a new view that displays the recommended URLs using the GAU recommendation system.
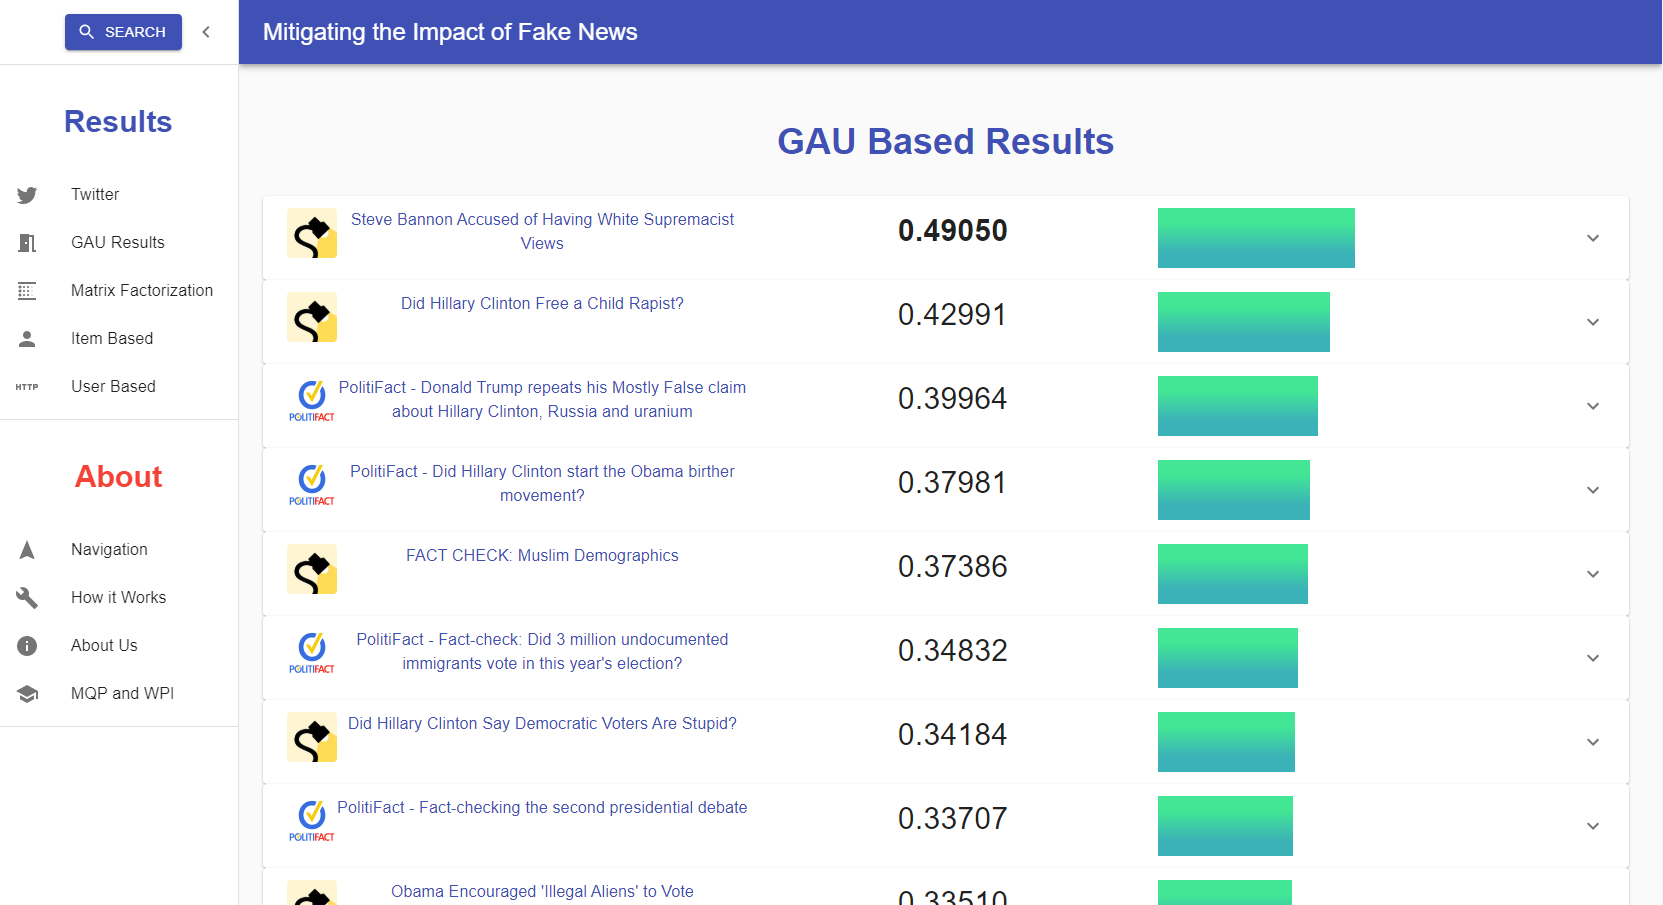
In this view, we can see a list of cards displaying the recommended URLs ordered by how highly they score using this specific recommendation system's metrics. Each card has the logo of the fact checking website, the title of the article, the calculated score, and a bar graph to show said score visually. If one wants to visit the website, they can clickt the title, and if you want to see the full web address they can click to the card to expand it.
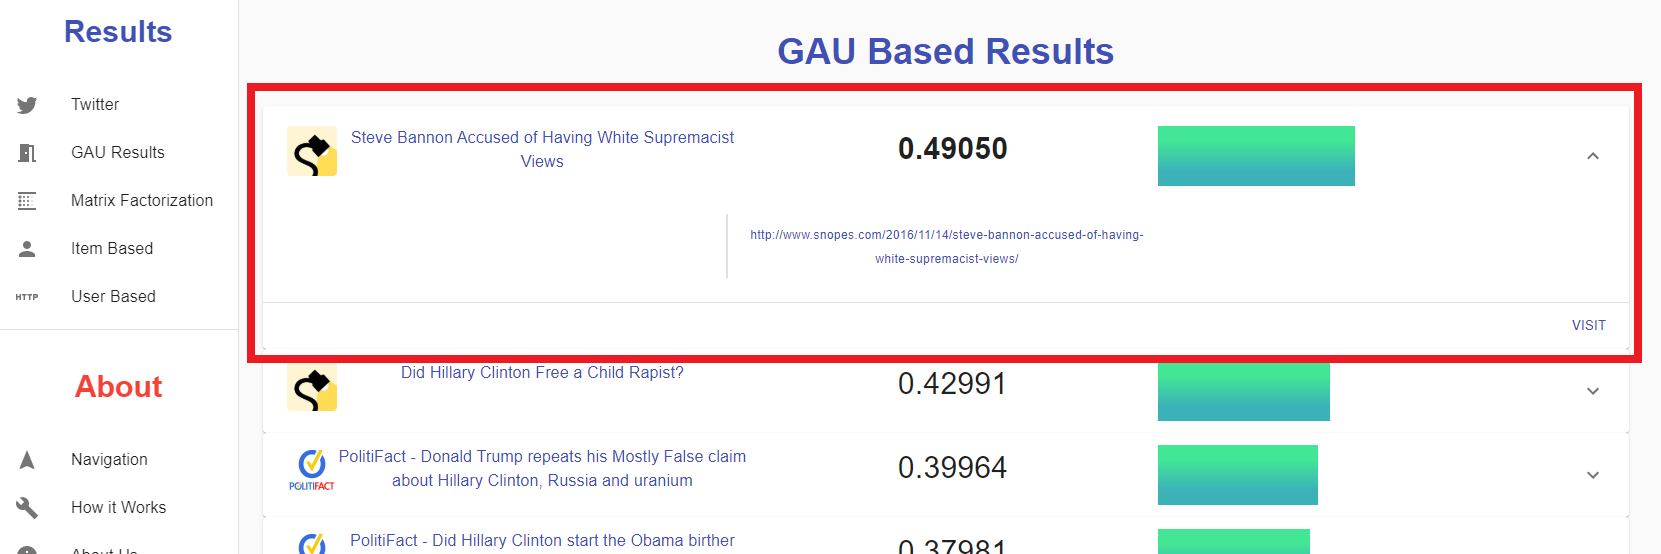
There are four different recommendation models that we explored: "GAU", "Matrix Factorization", "Item Based Recommendation", and "User Based Recommendation". Each model is listed on the side panel, and can be clicked on to see the recommended URLs based on that system. Under the "Results" section of the navigation panel, there is an "About" section. This section is intended to provide the user with some useful information about the project, the logic behind the recommendation systems, and the MQP. By clicking on the "Navigation" option, the we are brought to the navigation section which is intended to help the user explore the web application(that's were we are now). If the user clicks on the "How it Works" option, they are brought to the explanation page where we explain how each one of the recommendation models works. Clicking on the "About Us" allows the user to learn about the project creators Alex Rus, Alex Tian. Dr. Lee, and Ben Vo. And lastly, there is the "MQP and WPI" section where we can learn about the Major Qualifying Project and Worcester Polytechnic Institute.